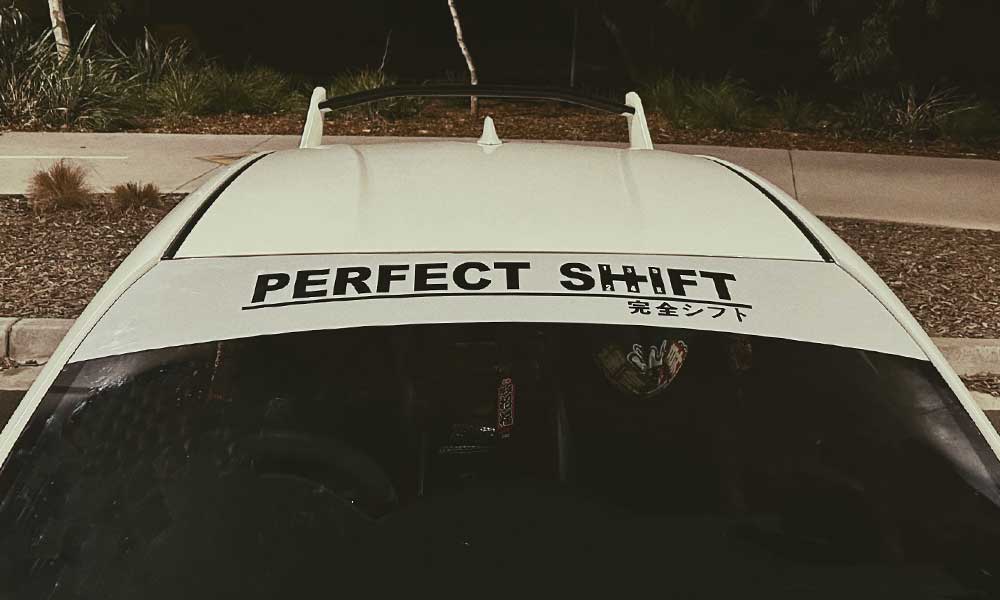
Have you ever experienced the frustration of messing up a lovely car decal during installation, especially when dealing with a large one? Fear not, this article aims to equip you with the knowledge and skills and help you apply them confidently and perfectly just like a pro.
INTRODUCTION
Before we dive deeper into the different application methods, it’s essential for you to know about some basics.
Understanding the distinction between decals and stickers is necessary? While these terms can be interchangeable sometimes, there are key differences:
- The Way They Are Made
Stickers are printed directly onto a backing paper, comprising two layers.
Decals, on the other hand, are printed onto a special paper such as vinyl, and covered by a transfer tape. They consist of three layers: 1) Top layer (transfer paper), the non-adhesive film that holds the sticker together; 2) Middle layer, the actual "sticker" layer; 3) The bottom layer (backing paper), that clings to the adhesive side of the sticker layer.

- The Way They Are Applied
For stickers, normally you apply them by peeling off the backing paper and sticking them to the desired surface directly, which is straightforward and relatively easy.
As for decals, it requires a different method which involves soaking in soap water, positioning, drying, and removing the transfer tape.
- Different Sizes and Styles
Stickers tend to be small and vibrantly-coloured, whereas decals are large and feature only 1-2 colours.
Now you understand the main differences between decals and stickers, let’s talk about the application process. Small stickers are relatively easy to apply, so we will focus on how to apply decals.

THE DRY METHOD
In this approach, the decal is applied simply like a sticker. Peel if off the backing paper, and adhere it directly to the desired surface where is cleaned beforehand.
Pros
- Quick application process.
Cons
- You only get one chance to get the position right! Repositioning will always ruin the adhesion of the decal. Usually improper application results in a lot of trapped air bubbles! Frustrating!
which leads us to.....
THE WET METHOD
This method takes longer to be finished, but is more forgiving as it enables you to adjust, position, and squeeze out those annoying air bubbles. It’s the method we recommend to using when applying large decals. Follow the steps below for optimal result:
1. Adequately clean the surface before application
2. Prepare a solution of about 10% soap and 90% water, spray the solution onto desired position and keep it wet

3. Peel the decal off the backing material, spray the soap water solution to the back side of the sticker layer, and then place the decal onto the surface. You can now slide the decal around to adjust the position until a perfect position is achieved. The soap water works by coating the sticker (to prevent loss of adhesion) while providing a slippery surface between the windshield and sticker for easy sliding!

4. Slowly and carefully trim the edges down to suit your car windshield size

5. Press the decal firmly to expel soap water and secure it in place. When the soap water gets expelled and dries out, the adhesive starts to kick in! Pass this stage, it is NOT RECOMMENDED to rip out and reposition the sticker as this will result in loss of adhesion. (So make sure you get Step 3 & 4 right!!!!!!)
6. Gently scrape out air bubbles with a squeegee. Try to get them all while the contact surface between windshield and decal is still wet, but don't stress if you can't get the pesky tiny ones just yet.
7. Allow the surface to completely dry (up to 24 hours), then SLOWLY peel back the transfer tape. After this, use a squeegee to gently expel remaining air bubbles between the cut-outs.
Tips: this last step requires tons of patience (speaking from experience ripping far too many decals because we wanted fast results!). Gently herd the air bubbles out with the squeegee. Try covering the surface with a film of paper or non-stick plastic sheet before squeegeeing, to protect the sticker layer from being scratched/torn. (Why not keep the transfer tape on while squeegeeing? Because it prevents air bubbles from escaping from the cutouts duh!)

8. Admire it!
Pros
- You get unlimited opportunities to adjust the position with the wet soap water coating
- Easy handling: the decal will not stick to the surface nor itself when wet
- Air bubbles are much easier to be pushed out before the surface dries
Cons
- It takes 3-24 hours for the wet surface to dry. However, using a hair dryer can expedite the process. Just remember to warm it up on a low heat.
CONCLUSION & ADDITIONAL NOTES
The wet method is a life-saver when it comes to applying a large decal, however, the choice of the method always depends on your preference and confidence. Regardless of the method chosen, keep the following in mind:
- Confirm the intended decal position in advance by marking using a pen or masking tape
- Always clean the surface before application
- Apply when whether is moderate (ideally between 15°C to 30°C)
- No direct sunlight during application
- Do not apply if rainfall is expected within the next 24 hours
By following these guidelines, you can confidently apply decals to your car with desirable result every time.


